Previously, in Part I, and continuing into Part II of this tutorial series, we delved into a handful of useful concepts. Some of these are specific to the Unity engine, such as animating a button press with coroutines or working with Unity events and utilizing TextMesh Pro. On the other hand, concepts like building a tokenizer, a recursive descent parser, or an Abstract Syntax Tree (commonly abbreviated as AST) are fundamental and can be found in many applications.
In Part III, we adapted this project to a VR environment, exploring the integration of OpenXR, XR Interaction Toolkit, and XR Hands packages. Note that this final part is specific to VR in Unity and is not directly related to the content in this addendum.
However, if you haven't read the first two parts, I recommend doing so. Today, we're starting with the project as it was at the end of Part II, and you can download it from GitHub.
The goal is to transform our classic single-line calculator into an RPN calculator, which, as the name suggests, is based on Reverse Polish Notation, also known as postfix notation.
Let's consider a simple expression: 2 + 1. While it's so common that we usually don't specify it's written using infix notation, the same expression can be represented as + 2 1 in prefix notation (or Polish notation) or 2 1 + in postfix notation (or RPN), which we'll be focusing on today.
How an RPN calculator works
You'll see that the implementation of an RPN calculator is significantly simpler than the one with a tokenizer, parser, and AST for evaluating expressions in infix notation. With RPN, there's no need for parentheses, and we don't have to worry about the order of operations since it can be evaluated in a linear fashion, from left to right
For example, the infix expression (1 * 2) - (3 * 4) would become 1 2 * 3 4 * + in RPN. To evaluate the expression programmatically, we just need basic math operations and a stack. Since this is an addendum to a tutorial series where we've covered advanced topics, I'll assume you know what a stack is and how it works.
Let's do it by hand before we start coding. We push 1 and then 2 to the stack, so our stack looks like this.
: 2 1 ] Now, we push an * operator. However, the operator itself is not pushed onto the stack. Instead, two elements are popped from the stack, multiplied, and the result is then pushed back onto the stack.
1 * 2 = 2; we push the result back to the stack, and since the two numbers were popped, our stack now contains only the result.
: 2 ]Let's push 3 and 4, and now the stack has three items.
: 4 3 2 ]After pushing *, we once again pop the two topmost elements and multiply them. The result of 3 * 4 = 12, so we push 12 back onto the stack.
: 12, 2 ]The last token is -, and I chose subtraction on purpose. With addition or multiplication, in other words, with commutative operations, it's not so obvious that we have to always put the first element from the stack on the right side and the second on the left side. In this case, 2 - 12 = -10, and our stack is now empty. We push the result -10 back onto the stack for further operations.
: -10 ]We can confirm that we get the same result using the more common approach with infix notation. When evaluating (1 * 2) - (3 * 4), first, we evaluate the sub-expressions in parentheses, and then 2 - 12 is indeed -10.
Stack Decorator Class
Before we start re-implementing the "brain" of our calculator, let's create a simple decorator for the Stack<T> class. This decorator will allow us to observe in the Unity Editor console what enters and exits the stack, as well as the numbers currently stored in the stack.
using System.Collections.Generic;
using UnityEngine;

public class StackConsoleLogged<T> : Stack<T>
{
    public new T Pop()
    {
        T result = base.Pop();
        Debug.Log($"{result} POPPED from stack");
        LogStack();
       	return result;
    }

    public new void Push(T item)
    {
        base.Push(item);
        Debug.Log($"{item} PUSHED to stack");
        LogStack();
    }

    private void LogStack()
    {
        T[] stack = ToArray();
        if (stack.Length > 0)
        {
            Debug.Log($"Stack: " + string.Join(", ", stack));
        }
        else
        {
            Debug.Log("Stack is EMPTY");
        }
    }
}
In the RPN class, we'll be using StackConsoleLogged<double> instead of Stack<double>. The beauty of this simple decorator is that we don't have to worry about logging anymore.
As long as we access the stack via this decorator class, we consistently get debug log messages every time we pop something from or push something onto the stack. When logging is no longer required, we can simply change StackConsoleLogged to a regular Stack at just one place.
RPN Class
We're going to encapsulate the core of the implementation in a class. First, let's create the new class named RPN and add a stack member variable.
using System;
using System.Collections.Generic;

public class RPN
{
    private readonly StackConsoleLogged<double> stack = new();
}StackConsoleLogged decorator; you can safely replace the type here with just Stack, and it won't affect any other code.Then, add a Dictionary<string, Func<double, double, double>> to associate operators +, -, *, /, and ^ with functions that accept two parameters of type double and return a double. Thanks to lambda expressions, we can create a very neat block of code.
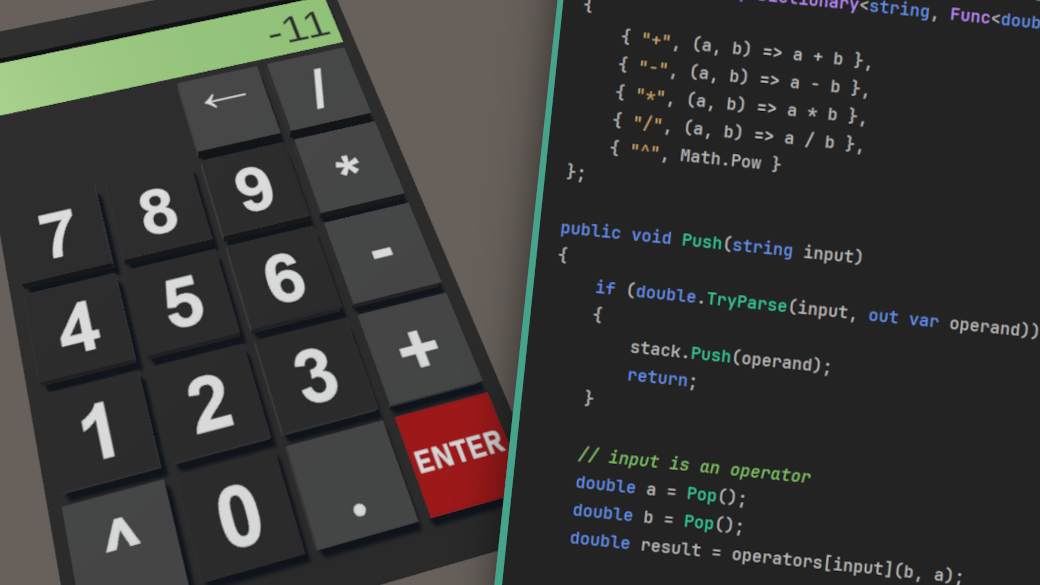
private readonly Dictionary<string, Func<double, double, double>> operators = new()
{
    { "+", (a, b) => a + b },
    { "-", (a, b) => a - b },
    { "*", (a, b) => a * b },
    { "/", (a, b) => a / b },
    { "^", Math.Pow }
};
Math.Pow is a method that already accepts two doubles and returns a double, which matches with the type of our dictionary values Func<double, double, double>. Thus, using a lambda (a, b) => Math.Pow(a, b) would be redundant.A Dictionary like this is often a cleaner alternative to if and switch statements or even switch expressions, which is a relatively new feature in C#. Now, we just need to add two public methods, Push and Pop. Let's start with the simpler one.
public double Pop()
{
    if (stack.Count == 0)
        return 0.0;

    return stack.Pop();
}public double Pop() => stack.Count == 0 ? 0.0 : stack.Pop();. However, every time an opportunity to use syntactic sugar appears, I think it's important to ask, 'What do I get, and what's the price?' My answer is that it wouldn't be worth it to decrease readability, even just a little, for saving a few lines. The current implementation is easy to understand, even for the most beginner programmers.This makes our stack virtually infinite. After pushing numbers 1, 2, and 3, we can imagine it like this.
: 3 2 1 0 0 0 0 0 0 0 0 0 0 0 0 0 0 0 0 0 0 0 -> ∞ Though, in memory, of course, the stack would really contain just three elements: [ 1, 2, 3 ]. After implementing the Push method, our RPN class will be complete.
public void Push(string input)
{
    if (double.TryParse(input, out var operand))
    {
        stack.Push(operand);
        return;
    }

    // input is an operator
    double a = Pop();
    double b = Pop();
    double result = operators[input](b, a);

    if (double.IsNaN(result))
        return;

    stack.Push(result);
}We first try to parse the input using double.TryParse method. If parsing succeeds, it means the input is a number. In that case, we push it to the internal stack and return early from the method.
When parsing fails, the method returns false, indicating that the input is an operator. Technically, we could pass something else, and then we'd get an exception at line 12 since our operators dictionary won't have such a key. However, in the way we'll be using this class, we can assume the input would be either a number or a known operator.
Now that we know the input is an operator, we pop two elements from the internal stack using our Pop method to get 0.0 if the stack is empty, instead of throwing an InvalidOperationException, and store them in variables a and b.
Then, we access a function associated with the operator from the operators dictionary and invoke the function with arguments b and a. Notice the order of arguments here: first is b, the second is a.
If the result is valid, meaning it is not NaN (not a number), we push the result back onto the stack. This method essentially replicates what we've been doing manually in the 'How an RPN calculator works' section.
Changes in Display Component
Now that we've implemented our RPN class, we just need to make a few changes in the Display class. Remove the member variables inFaultState and lastOpIsEvaluation from the top and add typeOver, pushOnType, and rpn instead.
- private bool inFaultState;
- private bool lastOpIsEvaluation;
+ private bool typeOver;
+ private bool pushOnType;
+ private RPN rpn;- prefix indicates lines that should be removed, while the + prefix indicates lines that are added instead.In the Awake method, we create a new instance of the RPN class and assign it to the rpn member variable.
  private void Awake()
  {
      textMesh = GetComponentInChildren<TextMeshProUGUI>();
+     rpn = new RPN();
}Then, we need to change the implementation of the Type method. We no longer need to call IsNumberOrBracket method, and when typeOver is true, before clearing the display, we want to push its content to the stack on the RPN instance.
public void Type(char c)
{
    if (typeOver)
    {
        if (pushOnType)
        {
            rpn.Push(textMesh.text);
        }

        Clear();
        typeOver = false;
    }

    if (textMesh.text == "0")
    {
        textMesh.text = string.Empty;
    }

    textMesh.text += c;
}Pushing the result of the previous operation back to the stack is important because, to see the result, we're going to pop it instead of just peeking the stack. This allows us to chain operations conveniently, instead of always have to manually pushing the result back by pressing the Enter button, as you'll soon see.
We also no longer need to check if the argument is a number or a bracket. We are only interested in clearing the content of textMesh before appending a new character if the current content is "0". You can remove the entire private bool IsNumberOrBracket(char c) method.
The EraseOne method needs just a small change. Replace inFaultState || lastOpIsEvaluation in the condition with just typeOver.
 public void EraseOne()
 {
-    if (inFaultState || lastOpIsEvaluation || textMesh.text.Length == 1)
+    if (typeOver || textMesh.text.Length == 1)
     {
         Clear();
         return;
     }

     textMesh.text = textMesh.text.Remove(textMesh.text.Length - 1);
 }
Finally, remove the entire Evaluate method, as we're going to implement Operate and Enter methods instead. Let's start with the simpler one.
public void Enter()
{
    rpn.Push(textMesh.text);
    typeOver = true;
    pushOnType = false;
}
When we press the Enter key on our calculator (which we're later going to replace the Equals key with), we just want to push the content of the display to the stack and set flags typeOver to true and pushOnType to false. This ensures that when we start typing another number, the current content of the display is erased before the new content is pushed to the stack.
The Operate method will be called when we press one of the operator keys on our calculator.
public void Operate(char c)
{
    try
    {
        rpn.Push(textMesh.text);
        rpn.Push(c.ToString());
        textMesh.text = rpn.Pop().ToString();
        pushOnType = true;
    }
    catch (Exception)
    {
        // ignore
    }
    finally
    {
        typeOver = true;
    }
}First, we push the content of the display to the stack, and then we also push the operator, triggering the operation to be performed on the topmost two elements, as you already know.
Then, we pop the result from the stack to display it, and that's why we want to push the result back to the stack when we start typing another number. After the operation is performed, we also always want to clear the display and start typing over.
When, instead of typing a new number, we press another operator—like when evaluating an expression 1 2 * 3 4 * +, for example—we call the Operate method again. This method always pushes the content of the display first to the stack. Without popping the result, it would be in the stack twice.
You can think of the display as virtually being a part of the stack in this implementation—it always represents the head, or the topmost element.
Changes in Calc.prefab
Changing methods in the Display class broke our On Press events on Key components on buttons in Calc.prefab.
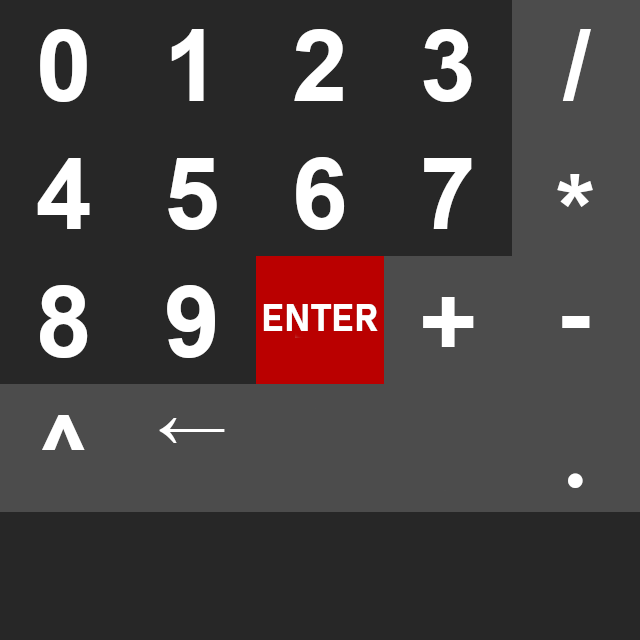
Before we fix them, let's first make some other small changes. Open the Calc.prefab and remove the CalcButton_LeftBracket and CalcButton_RightBracket game objects; we're not going to need them, as we've already discussed that the RPN calculator has no need for brackets.
Next, rename CalcButton_Eval to CalcButton_Enter. We're going to repurpose this button. In our RPN calculator, the Enter button pushes the number to the stack using the Enter method in our Display class.

Calc.prefab and the game objects it's made of after changes.Since we no longer have brackets and we changed the equals button to the enter button, let's also replace the image at Assets/Calc/Textures/CalcButtons.png with the following updated version.
Finally, select game objects for all buttons with operators—CalcButton_Div, CalcButton_Mul, CalcButton_Sub, CalcButton_Add, CalcButton_Pow—and in the Inspector, fix the broken event On Press event handlers to Display.Operate.
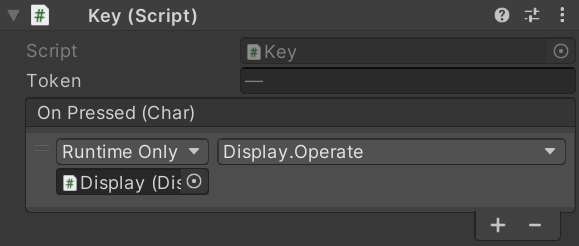
+, -, *, /, or ^) will be passed as an argument when invoking the Display.Operate method.Now select CalcButton_Enter and fix the event similarly, but this time set the event handler to Display.Enter.
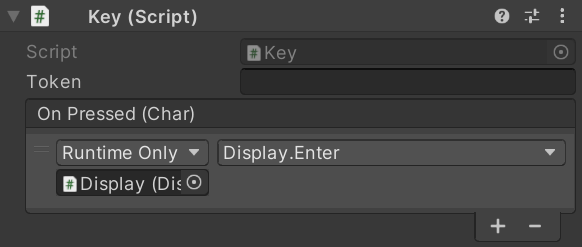
Display.Enter method has no parameters, it just pushes the content of display to stack.That concludes all the necessary changes; our RPN calculator should now be fully working. For a simple exercise, consider putting back one of the bracket buttons and repurposing it to a Pop button, which should does the opposite of the Enter button.
Final Thoughts
As you just saw, implementing an RPN calculator is much more straightforward than implementing a classic single-line calculator, where we need to tokenize and parse the entire input to create an AST before evaluation. In general, every problem usually has multiple solutions, and each solution comes with its own set of pros and cons.
I hope you enjoyed this addendum and learned something new. The Unity project with the complete implementation is available for you on GitHub, in the original repository for Part II, in a separate branch named rpn.