
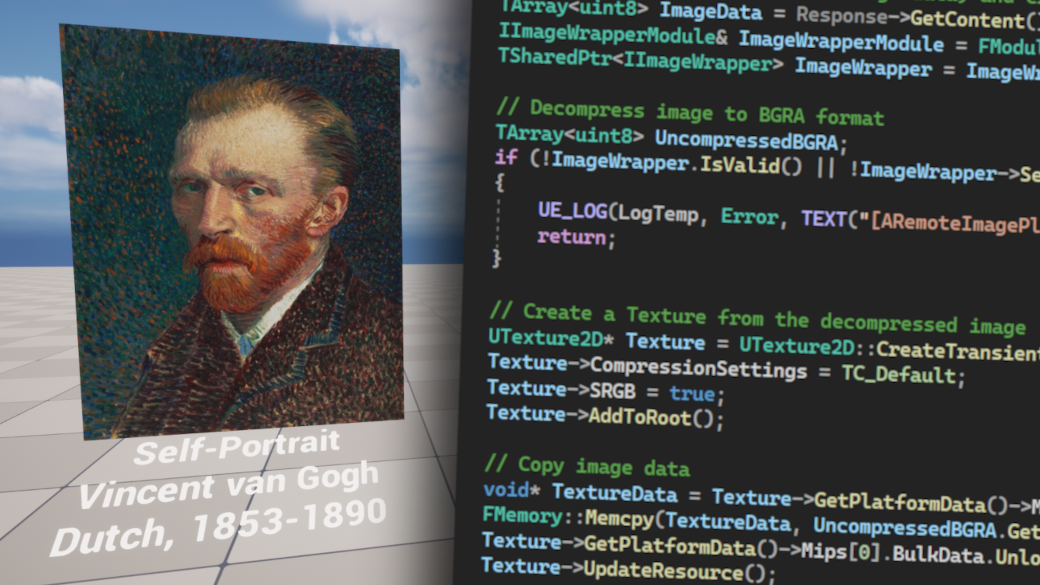
In today's post, I'd like to show you how to retrieve an image provided by The Art Institute of Chicago via its public API, how to create a texture from this image, and how to feed this texture to a material and render it on a plane accompanied by a floating text with title, name of the artist and some other details.
To achieve that, we're going to write a custom C++ class derived from Actor, with UStaticMeshComponent and UTextRenderComponent both attached to a USceneComponent set as a RootComponent.
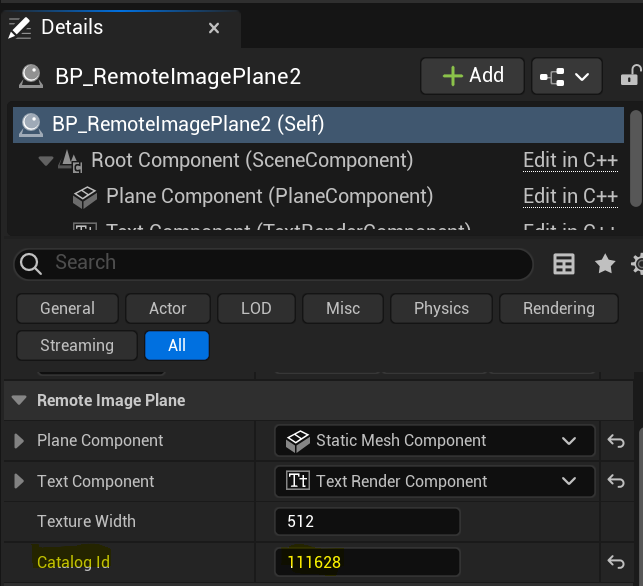
The key property of this class will be CatalogId, an integer that tells which artwork to fetch from the collection of the above-mentioned art institute, using an HTTP request.
We'll be able to build an entire virtual gallery using just this single custom actor. Adding a new artwork would be as simple as placing an instance of the actor into our map and setting the CatalogId.
However, I like my tutorials to be beginner friendly even when it covers slightly advanced topics. Let's take a step back now and talk a little bit about what is an API.
If you're already well familiar with the term, feel free to skip the following few paragraphs and dive straight into the implementation from Preparing a new Unreal Engine project.
What Is an API?
For the rest, API stands for Application Programming Interface. It provides a set of instructions that enable different systems to communicate with one another, specifying the methods for sending and receiving data, as well as the actions that can be performed.
In our scenario, we have two systems, one is the application we're going to build, using the Unreal Engine, and the other is a web server that provides an API for retrieving data from a database of The Art Institute of Chicago (ARTIC).
The web server acts as an API provider, while our application serves as its consumer. As long as a consumer makes a valid request, the API provider doesn't concern itself with who the consumer is or what they plan to do with the data; it simply provides it.
Actually, we could build a similar project in Unity or use an API from any other application that can make an HTTP request, such as a web browser. You can make a request right now by simply clicking on the following link:
https://api.artic.edu/api/v1/artworks/129884
When you clicked the link, your web browser made a GET request using the HTTP protocol and received a response containing data in JSON (JavaScript Object Notation) format.
Upon examining the JSON data¹ that you received, you'll notice that it contains information about Alma Thomas's artwork, Starry Night and the Astronauts, which is stored in the ARTIC collection with an ID of 129884.
1) To make the JSON data more readable, you may want to install a browser extension, such as "JSON Prettifier" or "JSON Formatter." These extensions will format the data in a more organized and easy-to-read manner.
How does this work? How can we retrieve and utilize data from a single API that doesn't differentiate between a web browser and an Unreal Engine application? The answer lies partly in the previous paragraphs.
This is because the API provides data using a standardized protocol and format. Your web browser knows how to send a request using the HTTP protocol and how to handle the response.
Fortunately, Unreal Engine is also equipped to handle this. It includes an HttpModule and JSON Serializer that we'll use to retrieve and parse data, respectively.
There's much more to learn about APIs and the technology behind them, including various protocols and data formats such as XML and others. Of significance is the fact that both requests and responses have headers, although I didn't cover them in this brief introduction.
Some APIs require authentication, which opens up another deep rabbit hole to explore. It's also worth noting that not all APIs are web APIs, and there's something called REST (Representational State Transfer), which is a specific architectural style and widely used approach for building APIs.
Preparing a New Unreal Engine Project
Now let's start building something. If you want to follow along (and I highly recommend that you do), begin by creating an empty C++ project in Unreal Engine 5.1.1.
It might work on other versions too, but version 5.1.1 is the one I've built the example project, so I cannot guarantee that it would also work on, for instance, version 4.27.
I've named my project FetchArt, but feel free to choose any name you like.
Creating a Material
We won't be needing any starter content, but we do require a material that we'll use to render texture to a plane later on.
In the Content Browser, create a new folder by right-clicking and selecting New Folder. Name the folder Materials. Then, create a new material by selecting New Material from the same context menu. Name the material ExampleMaterial.
Open the material and navigate to the Material Graph. From there, right-click inside the graph and search for Texture Sample. Once the TextureSample node appears, click on it to add it to the Material Graph.
Finally, right-click on the Texture Sample node and select Convert to Parameter. This will convert the Texture Sample node into a parameter node, allowing us to easily change the texture used by the material later on.
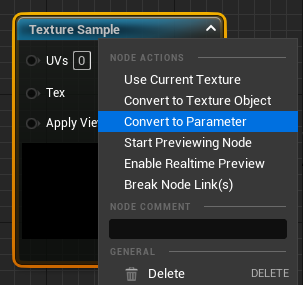
When converting the Texture Sample node into a Texture Parameter node, make sure to name the parameter TextureParameter and double-check the spelling. This is important because we'll be referencing this parameter by name in our C++ code.
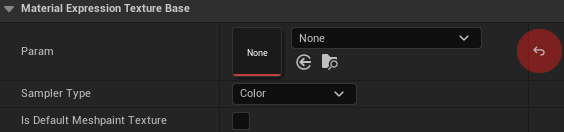
With the Texture Parameter node selected, look for the Material Expression Texture Base section in the Details panel on the bottom left of the editor. To assign a default material, click on the small curved arrow icon located on the right side of the Param row.
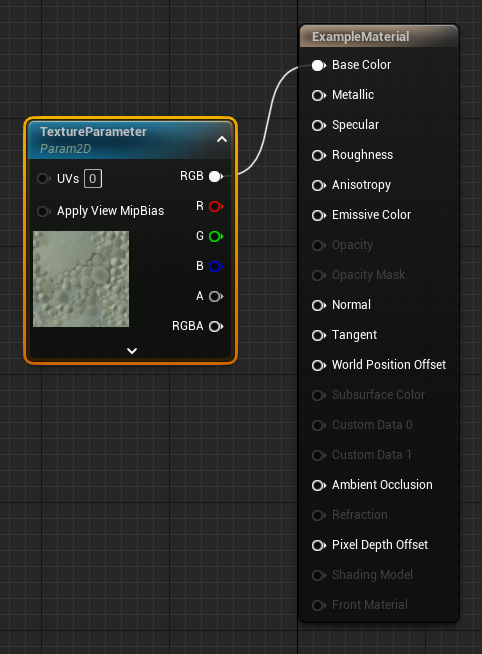
Finally, connect the TextureParameter output pin to the Base Color input pin of the ExampleMaterial. Make sure to save the material before closing the window or tab.
Adding a Custom Actor Class
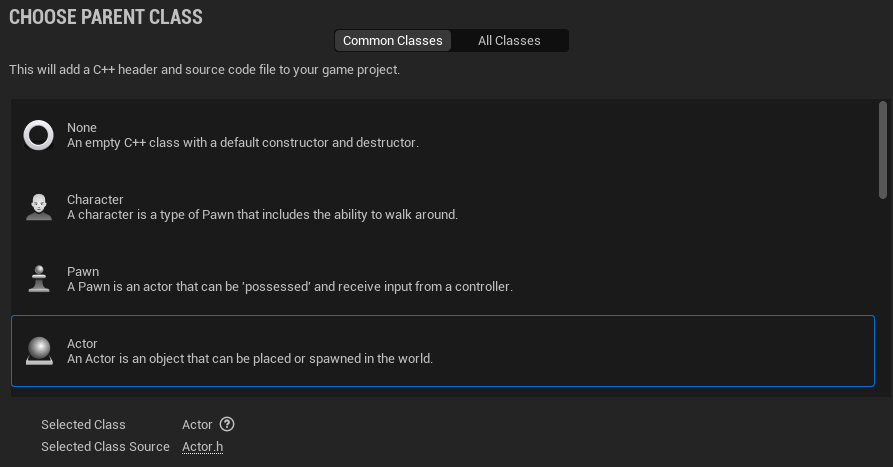
In the Content Browser, enter the C++ Classes folder of your project. Right-click on the folder and select Add New C++ Class. From the pop-up window, select Actor as the parent class and name the class RemoteImagePlane.
Importing Modules
Time to write some code. First, to prevent linker errors, you need to specify the modules that our project depends on in {YourProjectName}.Build.cs.
This C# file is a part of the Unreal Build Tool (UBT). When a project is built, UBT reads the file and uses it to generate the necessary build scripts and configuration files.
One typically adds modules when needed in Unreal Engine, but since I have already implemented the code for this tutorial, I already know which modules we will need, which are:
- HTTP
- Json
- JsonUtilities
- ImageWrapper
Add these module names to the PublicDependencyModuleNames list as follows:
PublicDependencyModuleNames.AddRange(new string[] { "Core", "CoreUObject", "Engine", "InputCore", "HTTP", "Json", "JsonUtilities", "ImageWrapper" });Header File
Now that the modules have been added to the project, it's time to make changes to our RemoteImagePlane class. Open the header file for this class, which is RemoteImagePlane.h.
This actor doesn't need to run any logic in every tick, so you can safely delete the declaration of the Tick method. Don't forget to also delete the implementation of the method in the source file, RemoteImagePlane.cpp. Additionally, in the constructor change the value of the PrimaryActorTick.bCanEverTick flag from true to false.
Back in the header file, between the #include RemoteImagePlane.generated.h and UCLASS() macro, add the following forward declarations and type definitions:
class UStaticMeshComponent;
class UTextRenderComponent;
class USceneComponent;

class IHttpRequest;
class IHttpResponse;

typedef TSharedPtr<IHttpRequest, ESPMode::ThreadSafe> FHttpRequestPtr;
typedef TSharedPtr<IHttpResponse, ESPMode::ThreadSafe> FHttpResponsePtr;Under the protected access specifier, declare the two delegate methods as follows:
void OnResponseReceived(FHttpRequestPtr Request, FHttpResponsePtr Response, bool bWasSuccessful);
void OnImageDownloaded(FHttpRequestPtr Request, FHttpResponsePtr Response, bool bWasSuccessful);To implement the desired functionality, our custom Actor requires a few components. These include:
UStaticMeshComponentto render a plane mesh on which we'll set a dynamically created material instance. The fetched artwork will be rendered on this component as a texture.UTextRenderComponentto display the title of the artwork, the name of the artist, and other relevant information about the artwork.USceneComponentto be used as a root component and to attach the other two components.
We don't want to attach the UTextRenderComponent to the UStaticMeshComponent or the default root component of the Actor, because it would restrict our ability to adjust the position of the text.
We'll need to modify the scale of the Plane to match the aspect ratio of the fetched artwork. To address these issues, we'll use a USceneComponent as the root component and attach the other two components to it.
Declare these three member variables, pointers to the above-mentioned classes, as follows.
UPROPERTY(EditAnywhere)
UStaticMeshComponent* PlaneComponent;

UPROPERTY(EditAnywhere)
UTextRenderComponent* TextComponent;

USceneComponent* SceneComponent;Also declare two additional member variables to set the width of the texture for our material and the ID of the artwork we're going to fetch:
UPROPERTY(EditAnywhere)
int TextureWidth = 512;

UPROPERTY(EditAnywhere)
int CatalogId = 129884;The last thing in our header file is a little helper method. This method pulls out properties from a received JSON without repeating the same code multiple times.
bool TryGetStringField(const TSharedPtr<FJsonObject, ESPMode::ThreadSafe>& JsonObject, const FString& FieldName, FString& OutString) const;Source File
Let's move on to the source file, RemoteImagePlane.cpp. The first step is to include all necessary header files:
#include "RemoteImagePlane.h"
#include "Http.h"
#include "JsonUtilities.h"
#include "Components/StaticMeshComponent.h"
#include "Components/TextRenderComponent.h"
#include "Components/SceneComponent.h"
#include "Materials/MaterialInstanceDynamic.h"
#include "Engine/Texture2D.h"
#include "IImageWrapperModule.h"
#include "IImageWrapper.h"In the constructor, where we already set PrimaryActorTick.bCanEverTick to false, create a USceneComponent and set it as the Actor's root component.
SceneComponent = CreateDefaultSubobject<USceneComponent>(TEXT("SceneComponent"));
SetRootComponent(SceneComponent);To create a UStaticMeshComponent in a similar way, start by finding the Plane mesh among Unreal Engine basic shapes using FObjectFinder. If the search succeeds, set the Plane as the component's static mesh. In case of failure, log an error using the UE_LOG macro. Finally, attach the PlaneComponent to the SceneComponent.
PlaneComponent = CreateDefaultSubobject<UStaticMeshComponent>(TEXT("PlaneComponent"));
static ConstructorHelpers::FObjectFinder<UStaticMesh> PlaneMesh(TEXT("/Engine/BasicShapes/Plane"));
if (PlaneMesh.Succeeded())
{
	PlaneComponent->SetStaticMesh(PlaneMesh.Object);
}
else
{
	UE_LOG(LogTemp, Error, TEXT("[ARemoteImagePlane] Failed to find mesh"));
}
PlaneComponent->SetupAttachment(SceneComponent);The last thing we need to do in the constructor is to create a UTextRenderComponent and attach it to our SceneComponent as well.
TextComponent = CreateDefaultSubobject<UTextRenderComponent>(TEXT("TextRenderComponent"));
TextComponent->SetupAttachment(SceneComponent);Now that we've created and set the components of our custom Actor, let's move on to the BeginPlay method. After calling Super::BeginPlay(), which invokes the method in the parent class (in our case, the AActor class), we need to create an instance of FHttpModule.
FHttpModule* HttpModule = &FHttpModule::Get();Next, use the HttpModule to create an HttpRequest. Set the request method to GET and construct the RequestURL using the ARTIC Public API route for getting artwork data with our CatalogId member variable as a parameter, and the Content-Type header to application/json.
TSharedRef<IHttpRequest> HttpRequest = HttpModule->CreateRequest();
HttpRequest->SetVerb("GET");
FString RequestURL = FString::Format(TEXT("https://api.artic.edu/api/v1/artworks/{0}?fields=artist_display,title,image_id"), { CatalogId });
HttpRequest->SetURL(RequestURL);
HttpRequest->SetHeader(TEXT("Content-Type"), TEXT("application/json"));Finally, bind our delegate method OnResponseReceived, we yet need to implement, to OnProcessRequestComplete and invoke sending of the request using ProcessRequest method of HttpRequest class.
HttpRequest->OnProcessRequestComplete().BindUObject(this, &ARemoteImagePlane::OnResponseReceived);

HttpRequest->ProcessRequest();Let's now implement the body of our OnResponseReceived delegate method. First, check if the bWasSuccessful parameter is true and if the Response object is in a valid state. If not, print an error message to the Output Console and return early from the method.
if (!bWasSuccessful || !Response.IsValid())
{
	UE_LOG(LogTemp, Error, TEXT("[ARemoteImagePlane] Request failed"));
	return;
}Now when we know our Response is valid, we can get the content data by using its GetContentAsString method. The returned string is in JSON format and needs to be deserialized to a JsonObject using the TJsonReader and static FJsonSerializer::Deserialize method, as follows:
FString ResponseStr = Response->GetContentAsString();
TSharedPtr<FJsonObject> JsonObject;
TSharedRef<TJsonReader<>> Reader = TJsonReaderFactory<>::Create(ResponseStr);
if (!FJsonSerializer::Deserialize(Reader, JsonObject))
{
	UE_LOG(LogTemp, Error, TEXT("[ARemoteImagePlane] Failed to parse JSON content"));
	return;
}Now that we've deserialized our content into a JsonObject, we can begin extracting data from the object and storing them in FString variables. However, before doing so, let's first implement our helper method, TryGetStringField.
This method takes a JsonObject, a field name, and a reference to an FString variable whose value will be set to the value of the field.
bool ARemoteImagePlane::TryGetStringField(const TSharedPtr<FJsonObject, ESPMode::ThreadSafe>& JsonObject, const FString& FieldName, FString& OutString) const
{
    if (JsonObject->TryGetStringField(FieldName, OutString))
    {
        UE_LOG(LogTemp, Log, TEXT("[ARemoteImagePlane] %s: %s"), *FieldName, *OutString);
        return true;
    }
    else
    {
        UE_LOG(LogTemp, Error, TEXT("[ARemoteImagePlane] Failed to get %s"), *FieldName);
        return false;
    }
}With that done, let's continue where we left off in the OnResponseReceived delegate method.
The JSON response from the ARTIC API is not a flat structure; instead, it looks something like this:
{
    "data": {
        "title": "Starry Night and the Astronauts",
        "artist_display": "Alma Thomas\nAmerican, 1891–1978",
        "image_id": "e966799b-97ee-1cc6-bd2f-a94b4b8bb8f9"
    },
    "config": {
        "iiif_url": "https://www.artic.edu/iiif/2",
        "website_url": "http://www.artic.edu"
    },
    "info": {
        ...
    }
}
Because of this, we first need to extract the individual data and config blocks, which are also of JsonObject type (yes, JSON objects can be, and often are, composed of multiple inner JSON objects). To do so, use the GetObjectField method.
const TSharedPtr<FJsonObject, ESPMode::ThreadSafe>& DataObject = JsonObject->GetObjectField("data");
if (!DataObject.IsValid())
{
	UE_LOG(LogTemp, Error, TEXT("[ARemoteImagePlane] Invalid DataObject"));
	return;
}Now that we have isolated the data block as an individual JSON object DataObject, we can declare FString variables for ImageId, Title, ArtistDisplay, and IIIFUrl, and use our TryGetStringField method to assign their values.
FString ImageId, Title, ArtistDisplay, IIIFUrl;
if (!TryGetStringField(DataObject, "image_id", ImageId) ||
!TryGetStringField(DataObject, "title", Title) ||
!TryGetStringField(DataObject, "artist_display", ArtistDisplay))
return;Now we can use the Title and ArtistDisplay strings we retrieved to set the text of our TextComponent. However, before doing so, we need to replace any en dashes with hyphens because there is no glyph for en dashes or many other special characters in the font material the UTextRenderComponent is using by default. We can accomplish this simply by using the Replace method.
FString LabelText = FString::Format(TEXT("{0}\n{1}"), { Title, ArtistDisplay });

FString EnDashChar = FString::Chr(0x2013);
FString HyphenChar = FString::Chr(0x002D);
LabelText = LabelText.Replace(*EnDashChar, *HyphenChar);

TextComponent->SetText(FText::FromString(LabelText));Since we're talking about strings, it's worth mentioning there are three types of string in Unreal Engine:
- FString – a mutable type that can be modified at runtime. It is used for general-purpose string handling.
- FName – an immutable type that is used to represent names and identifiers within the engine. It is often used for things like object names and variable names.
- FText – a localized type. It is used for UI text, game messages, and other text that needs to be displayed to the user.
Now that we have set the TextComponent, we can move on to getting the URL of the actual image.
This can be done by concatenating the ImageId we already retrieved from the DataObject with the IIIFUrl we still need to get from the ConfigData, an another JsonObject.
You already know how to achieve that. Pulling IIIFUrl out from ConfigData is not much different from retrieving data from DataObject.
const TSharedPtr<FJsonObject, ESPMode::ThreadSafe>& ConfigObject = JsonObject->GetObjectField("config");
if (!ConfigObject.IsValid())
{
	UE_LOG(LogTemp, Error, TEXT("[ARemoteImagePlane] Invalid ConfigObject"));
	return;
}

if (!TryGetStringField(ConfigObject, "iiif_url", IIIFUrl))
return;Now we have all the bits for concatenating the ImageUrl.
FString ImageUrl = FString::Format(TEXT("{0}/{1}/full/{2},/0/default.jpg"), { IIIFUrl, ImageId, TextureWidth });
UE_LOG(LogTemp, Log, TEXT("[ARemoteImagePlane] ImageUrl: %s"), *ImageUrl); In the case of the artwork with CatalogId 129884, TextureWidth 512, a and retrieved ImageId e966799b-97ee-1cc6-bd2f-a94b4b8bb8f9 the ImageUrl should be set to https://www.artic.edu/iiif/2/e966799b-97ee-1cc6-bd2f-a94b4b8bb8f9/full/512,/0/default.jpg.
We can use the ImageUrl to make a second HTTP request, this time to retrieve the image data. The syntax for this request is almost identical to the first one, since we are still obtaining data over the HTTP protocol.
FHttpModule* HttpModule = &FHttpModule::Get();

TSharedRef<IHttpRequest> GetImageRequest = FHttpModule::Get().CreateRequest();
GetImageRequest->SetVerb("GET");
GetImageRequest->SetURL(ImageUrl);
GetImageRequest->OnProcessRequestComplete().BindUObject(this, &ARemoteImagePlane::OnImageDownloaded);

GetImageRequest->ProcessRequest();
The key difference between the two HTTP requests is the delegate method bound to OnProcessRequestComplete. This marks the last piece of logic, we need to implement.
First, in the body of OnImageDownload method, ensure the request was successful and the response is valid, similarly as we did before.
if (!bWasSuccessful || !Response.IsValid())
{
	UE_LOG(LogTemp, Error, TEXT("[ARemoteImagePlane] Failed get image"));
	return;
}After downloading the image data, it will be stored in memory. However, we still need to do a bit of work in order to render that image on our PlaneComponent.
Start by loading the ExampleMaterial we've created in the editor and creating an instance of UMaterialInstanceDynamic type based on this material.
UMaterial* MaterialToInstance = LoadObject<UMaterial>(nullptr, TEXT("Material'/Game/Materials/ExampleMaterial.ExampleMaterial'"));

UMaterialInstanceDynamic* MaterialInstance = UMaterialInstanceDynamic::Create(MaterialToInstance, nullptr);With the dynamic material instance ready and the binary data of the fetched image stored in memory, the next step is to create an ImageWrapper using the IImageWrapperModule to decode the data.
TArray<uint8> ImageData = Response->GetContent();
IImageWrapperModule& ImageWrapperModule = FModuleManager::LoadModuleChecked<IImageWrapperModule>(FName("ImageWrapper"));
TSharedPtr<IImageWrapper> ImageWrapper = ImageWrapperModule.CreateImageWrapper(EImageFormat::JPEG);Now, check if the ImageWrapper is in a valid state. If it is, decompress the image data from the ImageData buffer and store them in another buffer UncompressedBGRA, also declared as TArray<uint8>.
The UncompressedBGRA buffer stores the image data in raw BGRA format, where BGRA stands for the color channels blue, green, red, and alpha (the transparency channel).
TArray<uint8> UncompressedBGRA;
if (!ImageWrapper.IsValid() || !ImageWrapper->SetCompressed(ImageData.GetData(), ImageData.Num()) || !ImageWrapper->GetRaw(ERGBFormat::BGRA, 8, UncompressedBGRA))
{
            UE_LOG(LogTemp, Error, TEXT("[ARemoteImagePlane] Failed to wrap image data"));
            return;
}We're almost there. Create a transient texture of the width and height taken from ImageWrapper, and the pixel format PF_B8G8R8A8. The transient means, the texture will be created only in memory, without creating a file on disk and the pixel format is the 32-bit format with 8 bits for each channel (blue, green, red, and alpha).
UTexture2D* Texture = UTexture2D::CreateTransient(ImageWrapper->GetWidth(), ImageWrapper->GetHeight(), PF_B8G8R8A8);Set the texture's compression to TC_Default and SRGB flag to true, this flag is indicating that the texture should be gamma-corrected when displayed on a screen. Then, call the AddToRoot method to prevent the object and its descendants from being deleted during garbage collection.
Texture->CompressionSettings = TC_Default;
Texture->SRGB = true;
Texture->AddToRoot();
Now create a pointer to texture data, copy the data from UncompressedBGRA buffer and update resource with the new data. This involves sending the texture data to the GPU, where it can be used in rendering.
void* TextureData = Texture->GetPlatformData()->Mips[0].BulkData.Lock(LOCK_READ_WRITE);
FMemory::Memcpy(TextureData, UncompressedBGRA.GetData(), UncompressedBGRA.Num());
Texture->GetPlatformData()->Mips[0].BulkData.Unlock();
Texture->UpdateResource();Great! We now have a texture ready to be assigned to the TextureParameter of our material instance. Once the texture is assigned, we can then set the material instance as the material on our PlaneComponent.
MaterialInstance->SetTextureParameterValue("TextureParameter", Texture);
PlaneComponent->SetMaterial(0, MaterialInstance);One last thing, not every artwork is a square, in fact, very few artworks has an aspect ratio of 1:1, most of them have different widths and heights and thus different aspect ratios.
That means we need to calculate the aspect ratio of the image and adjust the scale of our plane accordingly.
Fortunately, this is a straightforward process: we simply divide the image height by the image width to obtain the aspect ratio, and then scale the Y dimension of the plane by that value.
float AspectRatio = (float)ImageWrapper->GetHeight() / (float)ImageWrapper->GetWidth();
PlaneComponent->SetWorldScale3D(FVector(1.f, AspectRatio, 1.f)); This ensures that the artwork will be displayed without any stretching. The width of our plane remains constant, while the height would be scaled proportionally to match the aspect ratio of the image.
Blueprint Class
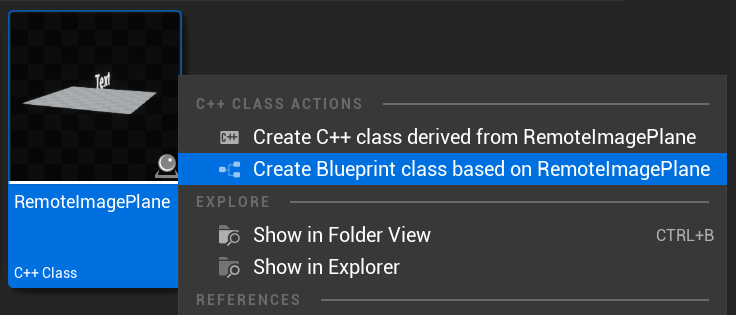
Our code is now complete, and we can proceed to create a Blueprint class based on our custom C++ class in the Unreal Editor.
To do this, right-click on the class in the Content Browser and select Create Blueprint Class Based on RemoteImagePlane from the context menu. Name the new Blueprint class BP_RemoteImagePlane.
We could have set the default position and orientation of our plane and text in C++ code, or created an instance by drag-and-dropping the class from the Content browser into the map and then edit the values in the Details panel.
However, customizing our actor visually in the Blueprint editor will be much more convenient. To do this, open the BP_RemoteImagePlane in the Full Blueprint editor and select the Plane Component in the Components tab.
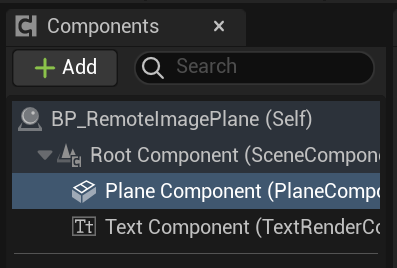
When you have the Plane Component selected, you can adjust its position and orientation using gizmos. To switch between the gizmos for setting the relative position and rotation, you can use the buttons located on the top-right corner of the Viewport tab, or you can use the W and E keys, respectively.
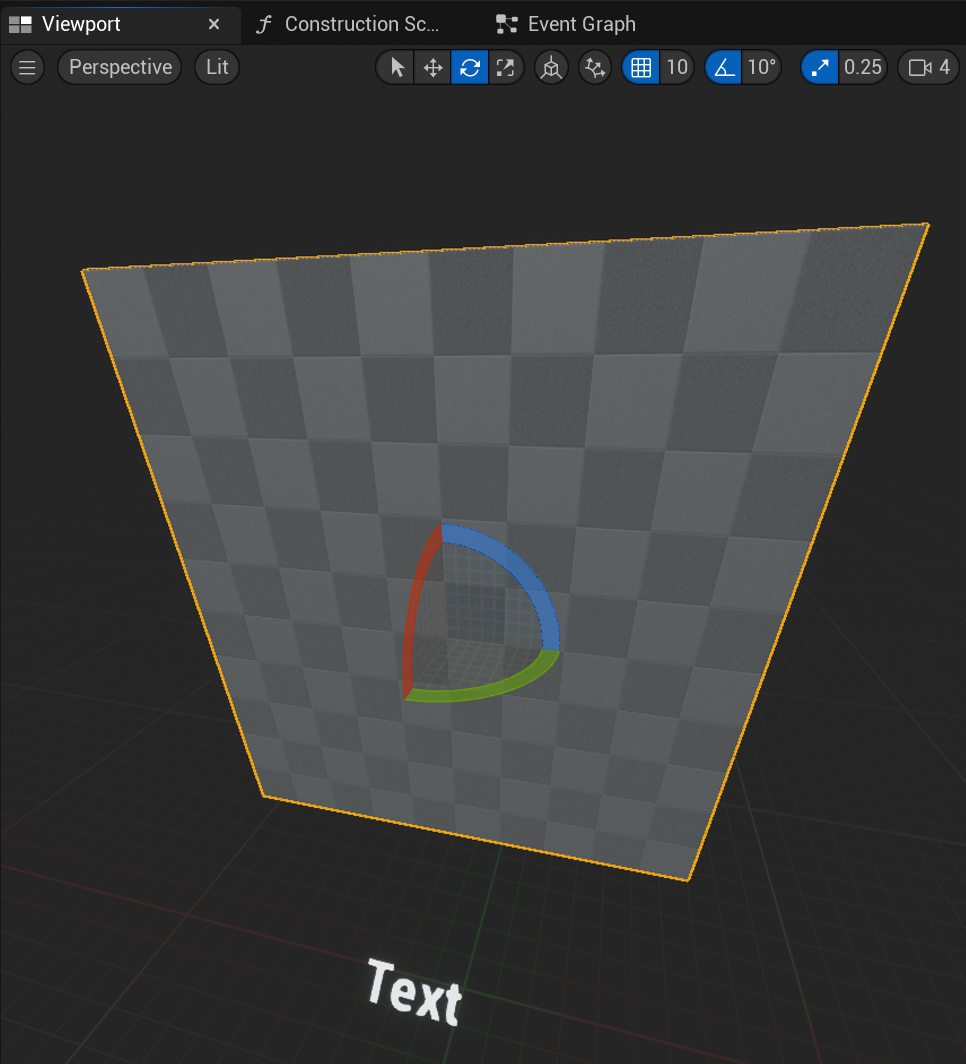
Also set the position and rotation of the Text Component. You can select it from the Components tab or by using the Select object (O) tool, which is the leftmost button located next to the buttons mentioned previously.
After positioning your plane and text as desired, hit the Compile button, save the blueprint, and exit the blueprint editor.
Finally, drag and drop the BP_RemoteImagePlane class into the map and click on Play button (or press Alt+P). You should see something similar to this:

Place some more instances of BP_RemotePlaneImage in the map, and set a different CatalogId for each one in the Details tab while instance is selected.
To obtain more catalog numbers, you can browse the ARTIC collection at https://www.artic.edu/collection. The number is always present in the link to the artwork, such as in the following example: https://www.artic.edu/artworks/28560/the-bedroom.
Alternatively, you can obtain catalog numbers and all other public API data from the Data Dump.
Final Thoughts
If you have followed along and managed to get this far, give yourself a pat on the back, especially if you are a beginner. You have learned about APIs, how to make an HTTP request, how to deserialize a JSON response, and how to extract data from complex JSON structures. You have also gained a few other bits of knowledge about Unreal Engine, such as the fact that there are three different types of strings.
On top of that, you now know how to create a dynamic material instance and a transient texture. You also know how to convert image data, such as JPEG format, into an array of raw data in a specific pixel format. You're able to push this data to the texture and set the texture as a texture parameter of the dynamic material in C++, which is a fairly advanced topic.
One final thought on refactoring: almost all the logic is implemented in a few functions, and most of them perform more than what a single function should.
Splitting the logic into smaller functions, each with descriptive names, would be a reasonable thing to do. This can help create self-documented code, which is code that is easy to read and understand without the need for additional comments.
I've decided to keep the tutorial implementation as is so that I can explain it in a linear way. However, the example project has been carefully commented. If you choose to refactor the code, it would be a great exercise and a way to solidify what you've learned today.
Thank you for reading this post. If you enjoyed this post, follow me on Twitter where I post almost exclusively about game development and programming topics.
