
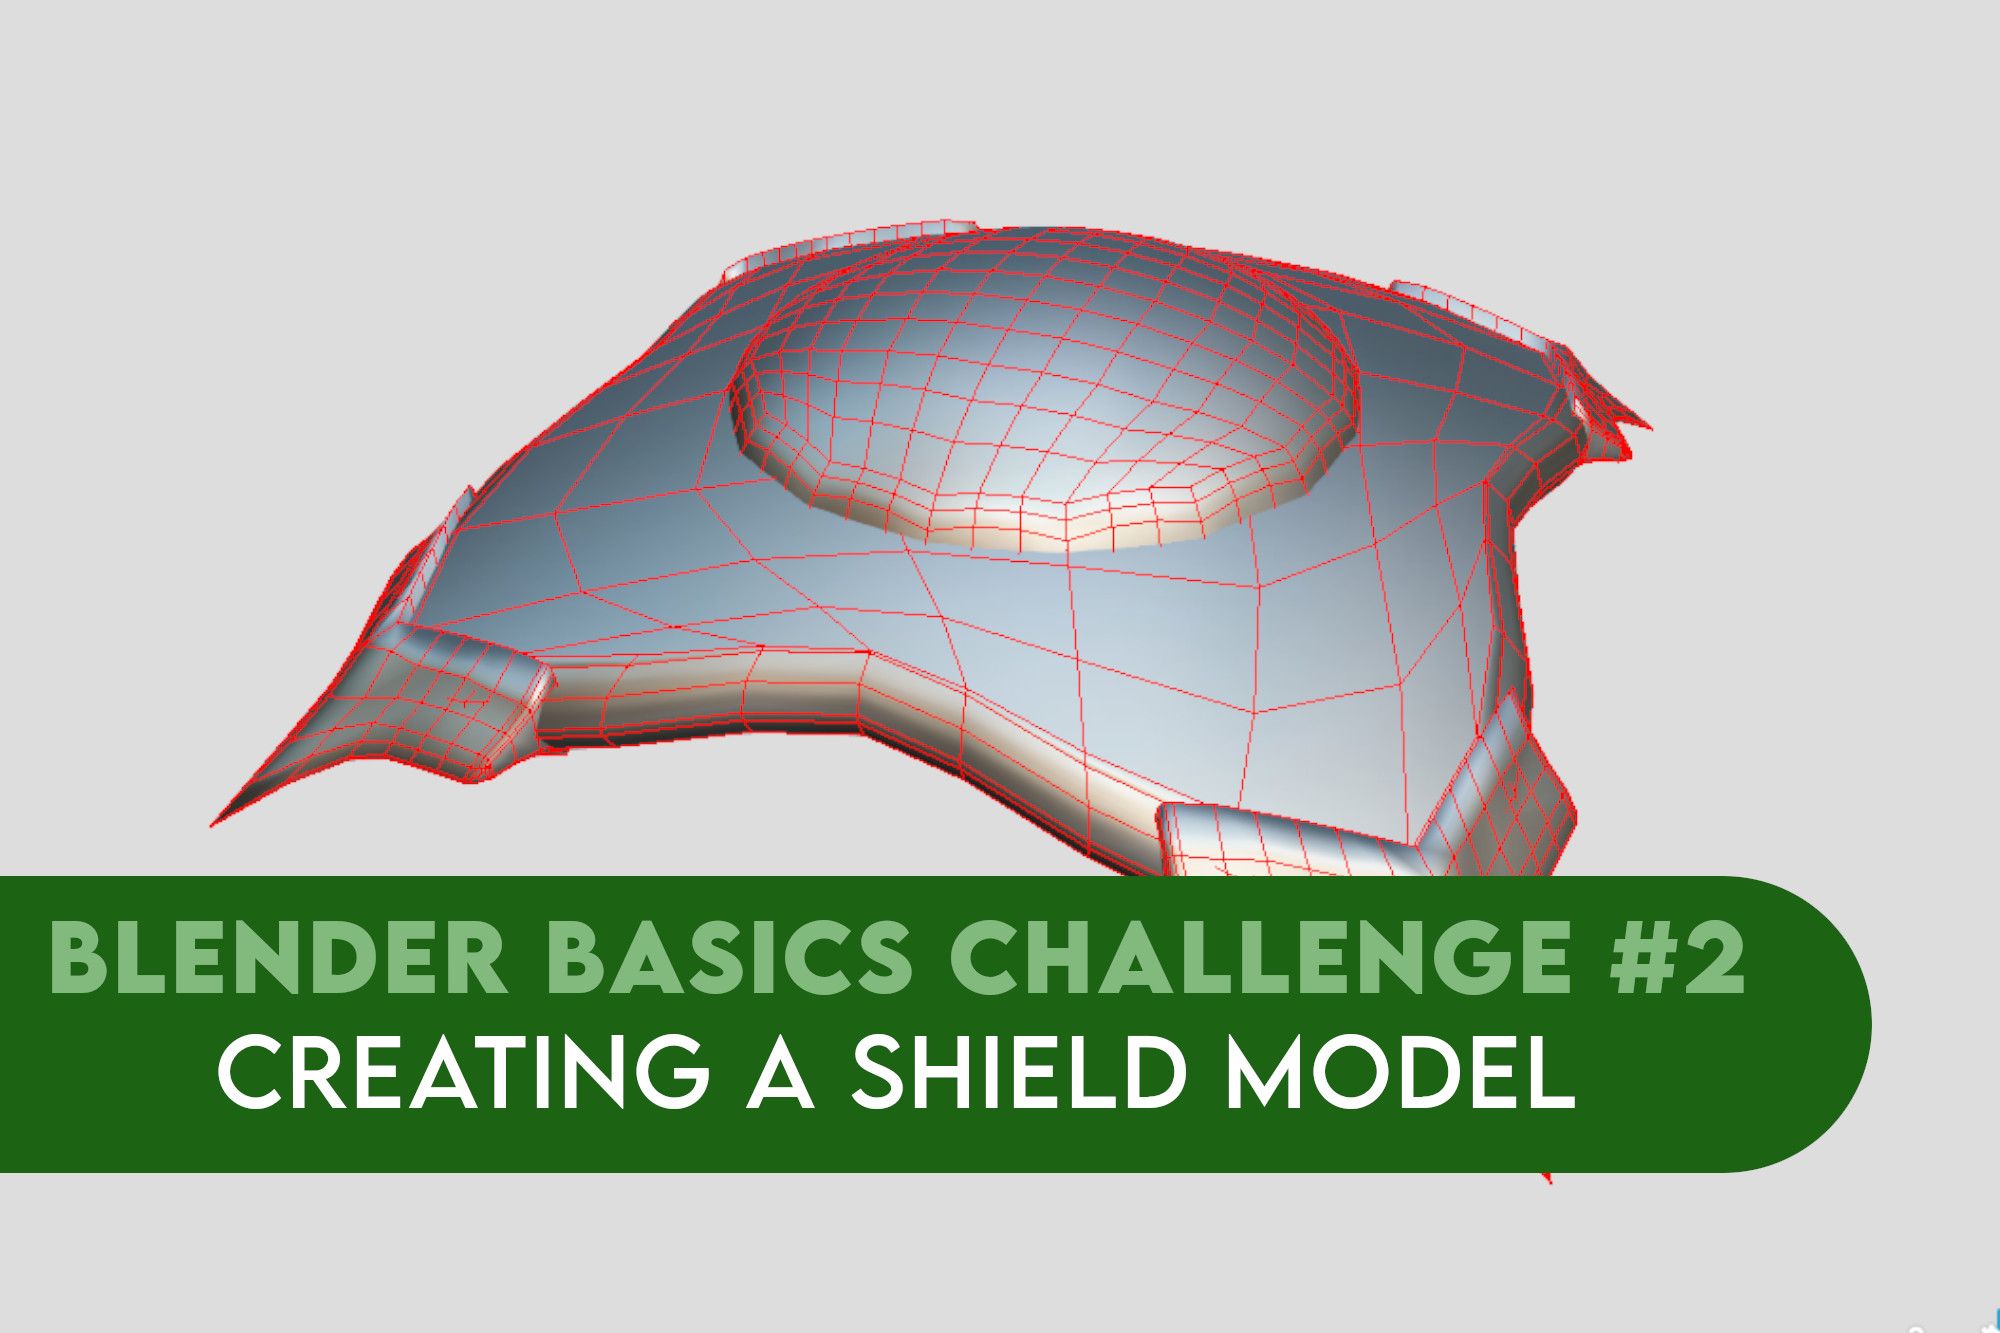
Following on from the last challenge, this time we’re thinking of a shield design with some added features of our own.
Last time we created a sword to use as an asset for a Unity project or for use in a Blender scene. Now, we’re going to work on a shield – and this time we’re going to try and create something more unique from a reference image.
Remember, I am not an expert – you might have a lot of experience on me, but I am happy to take feedback from other people on what else I should be doing. Hopefully this also helps some people out who are starting out with 3D modelling and texturing.
As before, this assumes you have some basic familiarity with Blender’s modelling and texturing features – refer to the GameDev.tv course if you’re stuck on a particular part of this!
Feel free to also share your work on the GameDev.TV discord, as well! The aim here is to produce a shield and to add some sort of unique feature, but to also maintain a realistic poly limit. We could create something with a silly amount of vertices, but that will end up using a disproportionate amount of memory when it is rendered in a scene.
Our reference
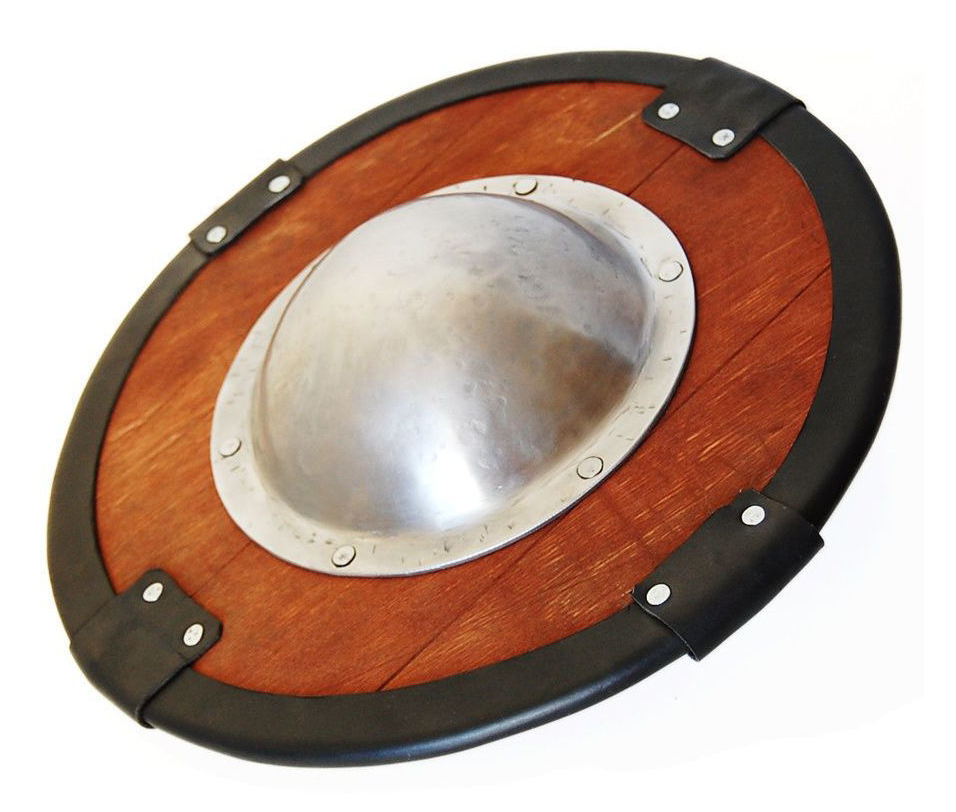
I’ve searched for a bucker-type shield because I want to make a basic shield that has a metal area in the middle. However, I want to expand on this by making it appear to be a bigger style of shield, and to alter the model so I can add some metal pointed edges.
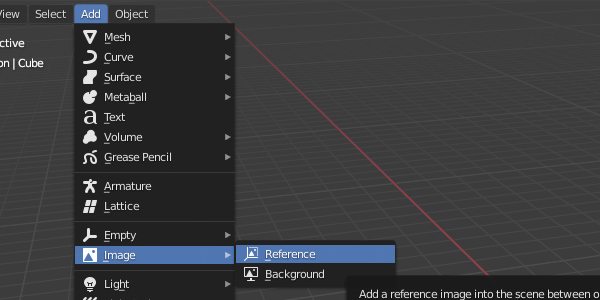
Once you’re ready to model, adjust your view to the X, Y or Z axis and import your image to Blender.
I’ve broken up my model into a number of separate ‘areas’ so I can assign materials to them later, and so I can apply consistent UV mapping.
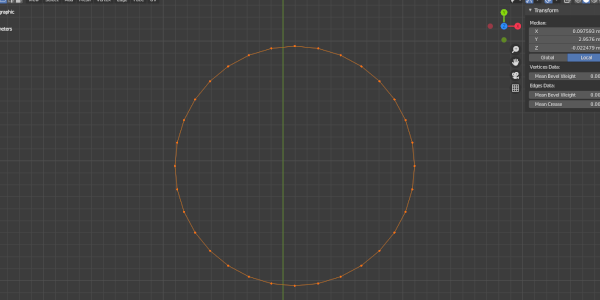
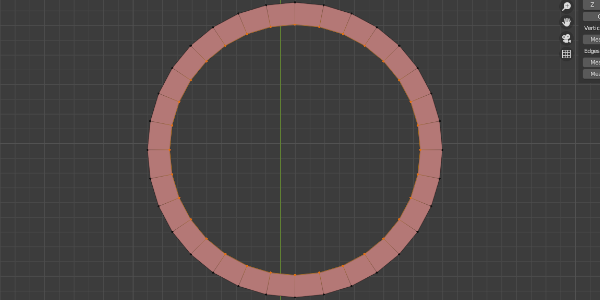
I want to focus on the main 'body' of the shield first. In order to achieve this, what I have done is created a circle, filled it in with quads and then stretched out four of the points with proportional editing.
I found an easy way to fill in a circular model, because it took me some time to understand what is a fairly easy thing to do!
The problem with filling in this shape simply by pressing F is that it creates an ‘ngon’ – a shape that has five or more sides or edges connected by five or more vertices. This causes issues with rendering and when trying to smooth over a model – and if you’re looking to create something to be animated and rigged, you want something that is as clean as possible.
This link talks about these issues in detail, but the biggest advice to take from this is that you should be using quads at all times. Meshes should be made out of shapes made of four sides and four vertices. It’s best to start getting into the habit of this now to avoid having to relearn how to create stuff later.
That takes us back to our circle. How can we fill this in? Luckily, Blender has two simple steps to navigate this issue.
First, go to Edit mode and highlight all vertices and press E to extrude them. Immediately press S afterward to move the extruded vertices by scale, and move them inward to the centre, so we have something like this:
Afterwards, we want to click on the Face menu and select ‘Grid Fill’. This will do the following:
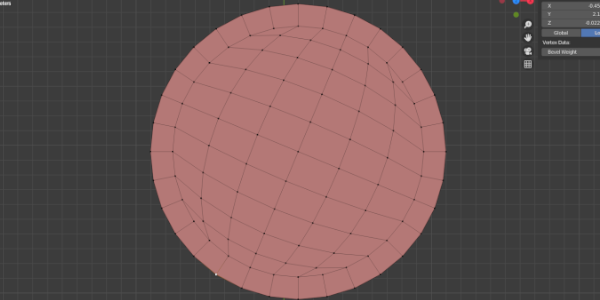
This should help prevent any shading issues when inspecting the model. The Grid Fill tool has an option to edit how the shape is filled - try to adjust the setting so the shape is somewhat symmetrical still. This benefits me because I want to safely deform this new shape!
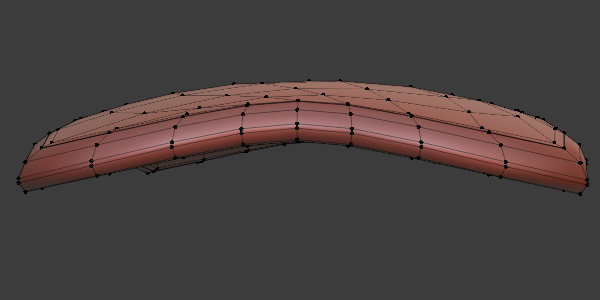
I extruded the edges of this model on the Z axis to give the model some depth. I also decided to add some curvature to the edge using the Bevel tool.
Finally I was able to use proportional editing to bend the model further. To achieve the plus-like shape, I scaled a four vertices at each 'corner' of the shape to influence the rest of the mesh, and I then curved the whole model by selecting the central vertice and moving it on the Z axis.
I ended up with this:

Generally, I tend to use the proportional editing tool to create curved edges or shapes, but there are other methods to manipulate vertices as well. Whatever gets you the end result with clean topology, go with that.
This is the basis of our shield, and our other features will fit around this shape. You don’t have to come up with something incredibly complex – the main thing I wanted to add from the reference was the metal centre of the shield. This was achieved by subdividing another circular plane and extruding a vertice upwards with proportional editing in a similar way to earlier.
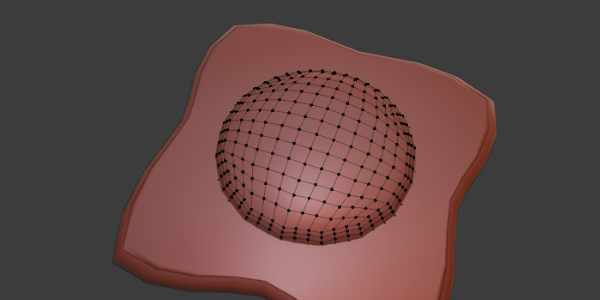
You will notice I didn’t opt to connect the meshes together – some game objects do not do this, and to my knowledge there is no drawback so long as any loose ends are hidden inside the mesh. Obviously if you were to 3D print this model, that would be a different story!
Finally, the bladed edges. For this, I extruded some vertices on one of the corners of the shield by width, to made the edge ‘larger’. I then used Separate (under the Mesh menu) to turn the extrusion into a separate mesh, and then deleting the remaining loose edges on the original model. Finally, I joined up the individual loose vertices of the new mesh to ensure it is made out of quads.
Finally, I subdivided a few times and started playing around with where I wanted the blade to ‘point’. Honestly, this was a bit trial and error, so I couldn’t exactly tell you for sure what I did! I encourage you to play around with proportional editing once more – a mixture of scaling and moving vertices will get you some sort of result, remembering to rotate the mouse wheel to affect the severity of how other vertices nearby get edited as a result.
You can see below how I used the highlighted vertice to add a 'point' to the tip of the metal part here.

For full details, look at the Sketchfab model I uploaded and have a look at what I tried for myself, You may have different ideas for how to structure your model, but remember – quads are important, especially when it comes to creating UV maps for your model!
In my follow-up post I'll talk about the texturing process using a mix of Blender and Substance Painter to achieve some neat results. It's important to get clean UV maps to ensure you don't run into texturing problems later - I'll talk about what I did with my model to help create something decent (hopefully!).
Have a peek at the model below for some hints - wireframe mode might help you out. I also added some handles - see if you can figure out how to add some of your own, as well.